Valve clearance check and shim swap
Posted: Mon Jan 12, 2009 12:36 pm
A few of you may be tackling this over the winter so here is a guide to help you along. Use this in conjunction with the "top end" part of the workshop manual.
I've used the engine still in the frame to see what you'll be up against and I'm glad i did as it certainly needs a few done
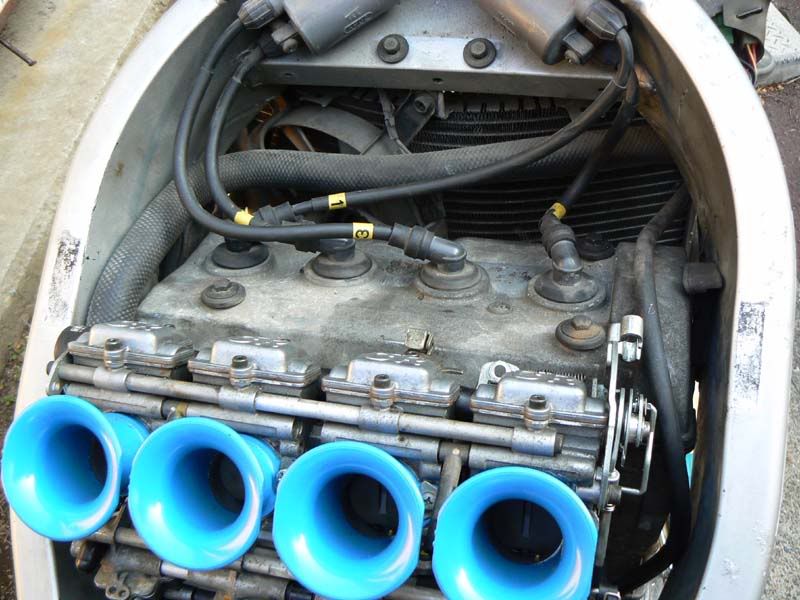
Your going to have to get access to the pulsar cover for removal and of course remove the fuel tank,airbox and disconnecting the carb's from the inlet rubbers makes the Cam cover off a bit easier too. ( My initial reaction was remove the engine too ! )
)

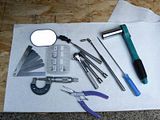
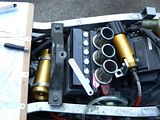
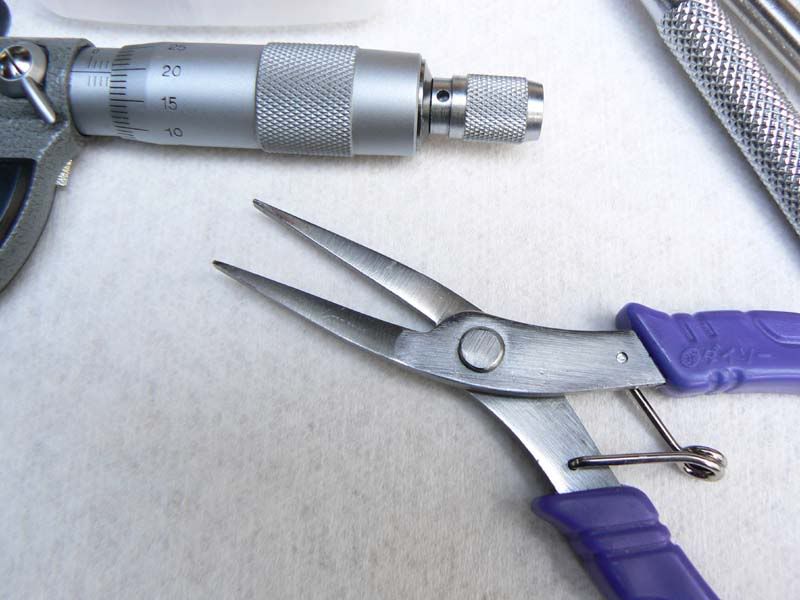
Recommended / Necessary tools:
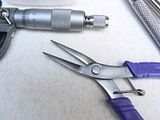
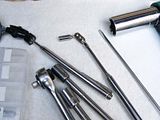
Magnet pick up tool - as pictured.
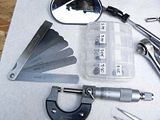
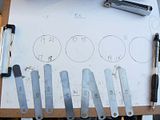
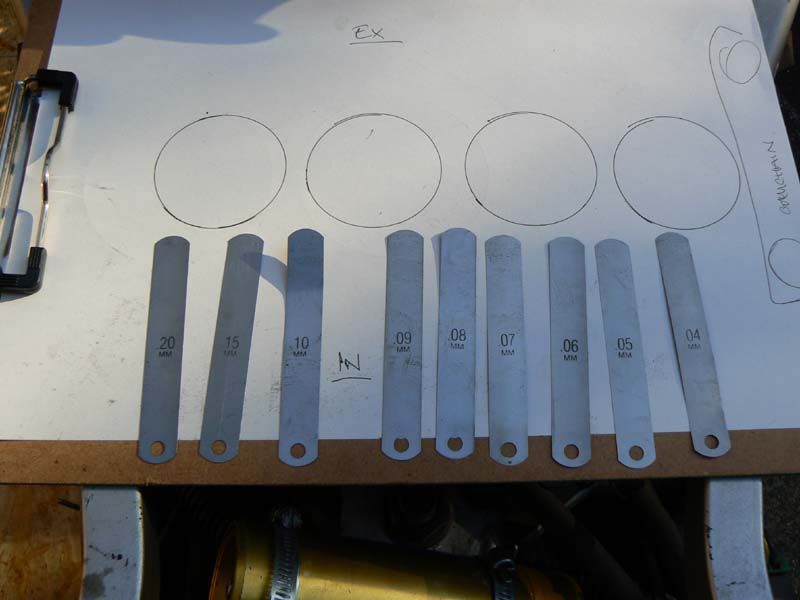
Angled feeler gauges - you'll see my new flat set is already bent !
Micrometer.
Inspection mirror.
Flat leg pliers.
Small long handled screwdriver.
8 & 10mm small sockets
19mm medium socket
Box for shims.
Arm yourself with a sheet of paper and a pen too :

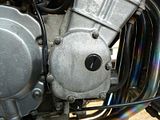
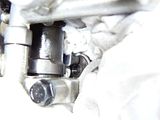
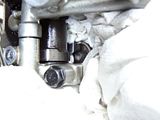
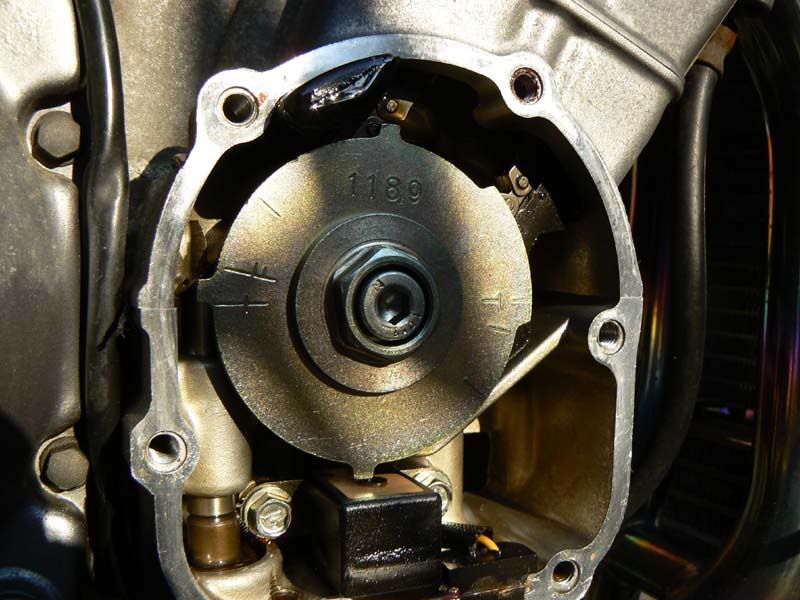
Pulsar Cover:Remove pulsar cover by undoing 6 x 8mm hex heads.
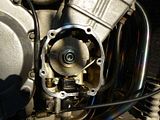
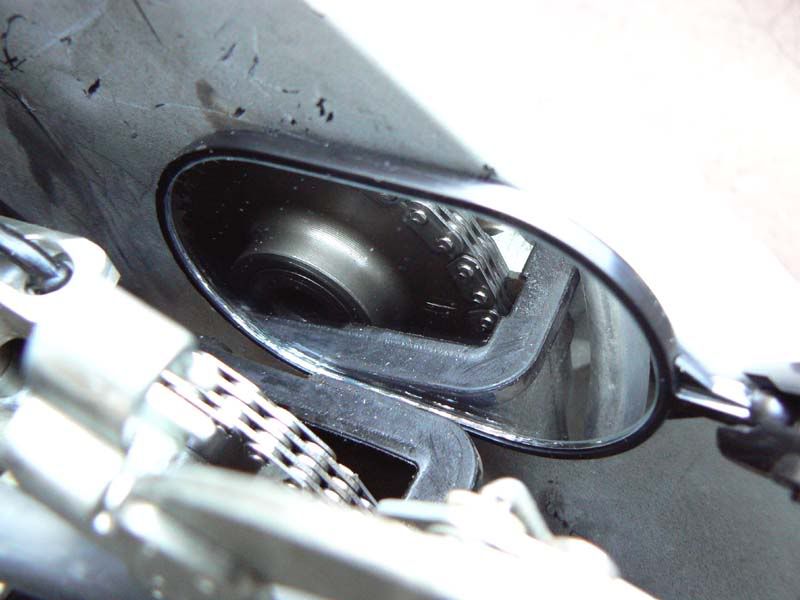
Pulsar/rotor set on "T" mark for measuring valve clearance: You'll need a 19mm socket on a ratchet for spinning the engine to set up the timing marks.

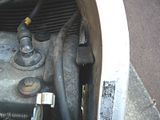
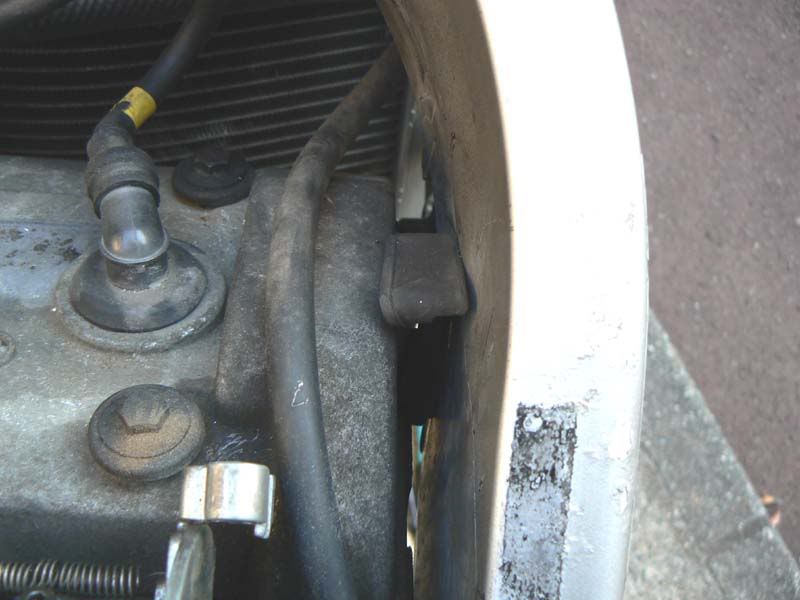
Cam cover has side vibration dampers that need removed:You'll also need a 10mm socket for removing the rocker cover.
Cam cover:
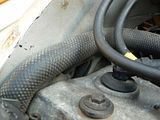
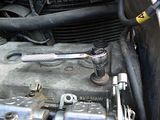
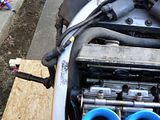
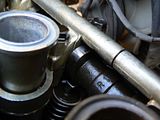
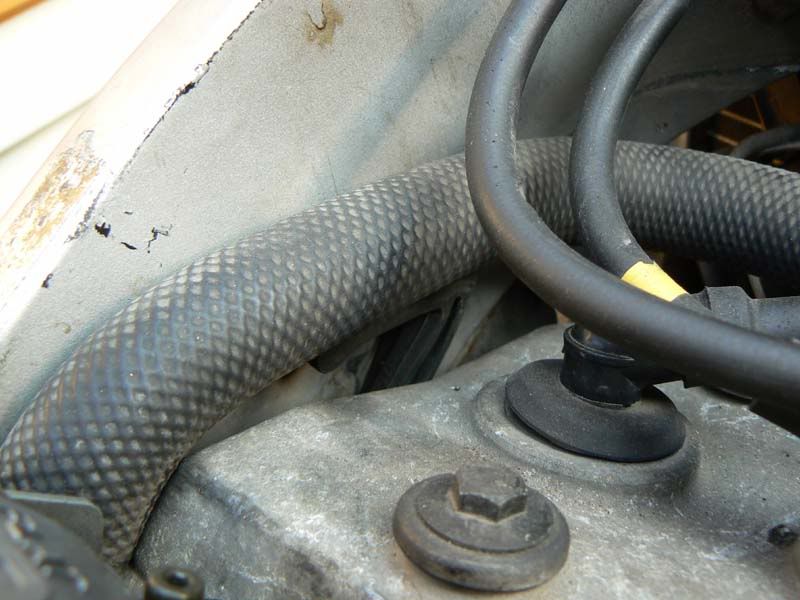
Coolant hoses get in the way but don't need removed: I also dangled the HT leads over the side of the frame beams (not so much dangled as they are stiff as a board with age)
Lifting cam cover and holding hoses out of the way:
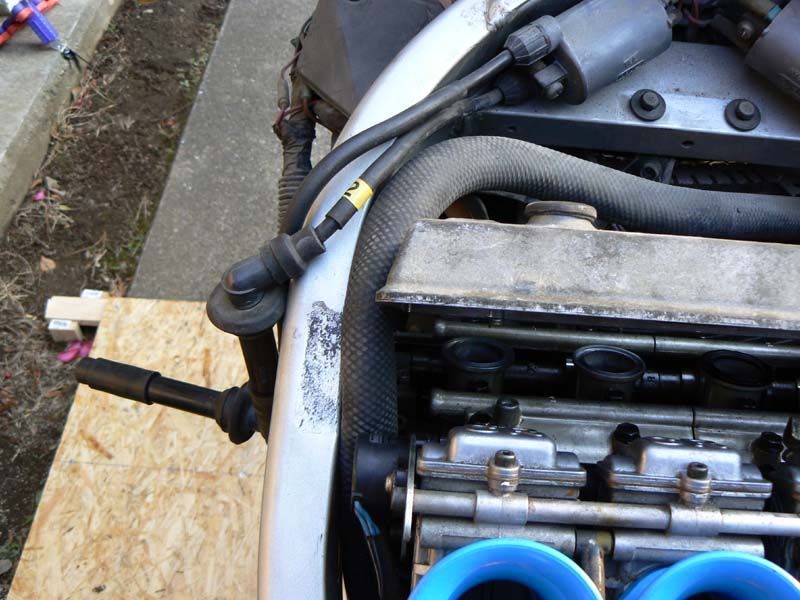
It's a bit of a wrestle but the cover eventually comes away:
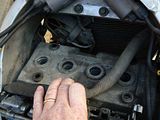
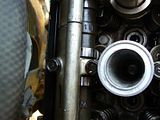
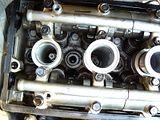
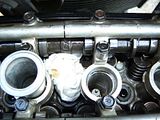
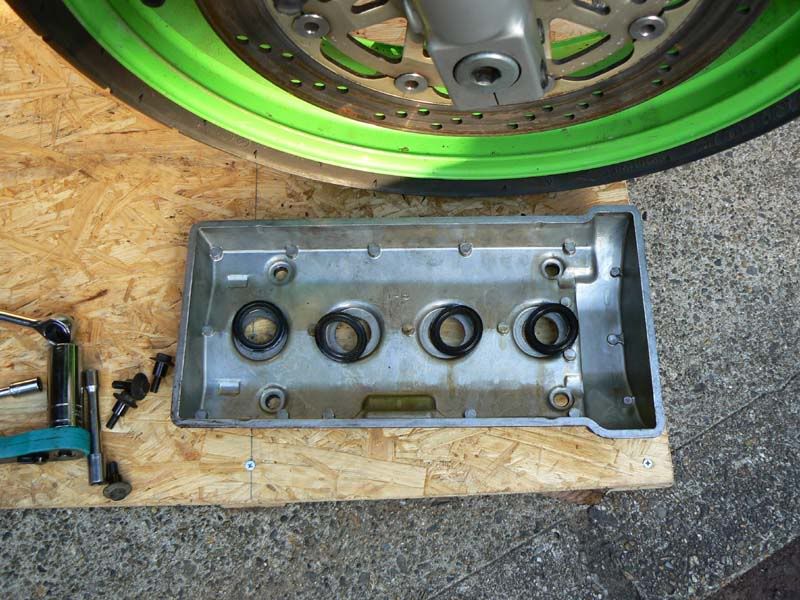
Make sure you have the four oil seals that sit on top of the spark plug tunnels:
With the pulsar set up on it's "T" marks you need to identify what valves can be checked.

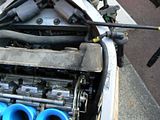
The camshaft sprockets have alignment marks on them for reference but the frame beam pretty much obliques it so this is where the inspection mirror comes in handy . In this position :
The following valves can be checked adjusted, #2 Inlet , #3 Exhaust , #4 Inlet & #4 Exhaust
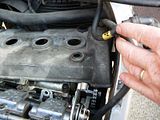
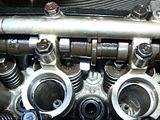
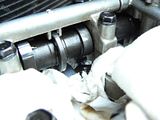
The cam lobes for #4 cylinder will look like this:
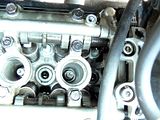
If you look to left hand side of the cam's you'll also notice they have deep notches in them at this setting they will be pointing away from each other:
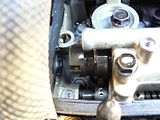
Once you have finished doing these valves you then spin the timing mark 360' so that the sprocket marks oppose each other and the notches on the other end will look like this:
The T mark will still be like this:
The following valves can be checked adjusted, #1 Exhaust , #1 Inlet , #2 Exhaust & #3 Inlet
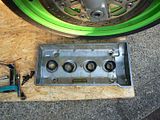
Another reference is the actual camshaft lobes themselves. On each timing setting the lobes for cylinders 2&3 always point straight up:
On one cycle the exhaust of cylinder 3 is pointing up and the Inlet of cylinder 2 is also the same (their counterpart is fully compressing the valve open). On the next set-up cycle then Inlet on cyclinder 3 is pointing up and Exhaust on cylinder 2 is also the same.
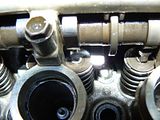
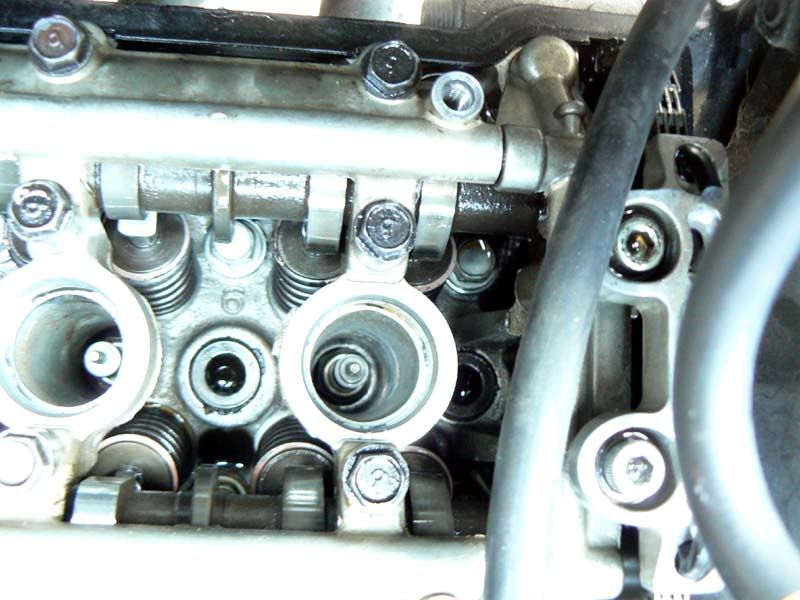
The cam lobes for #1 cylinder will look like this:
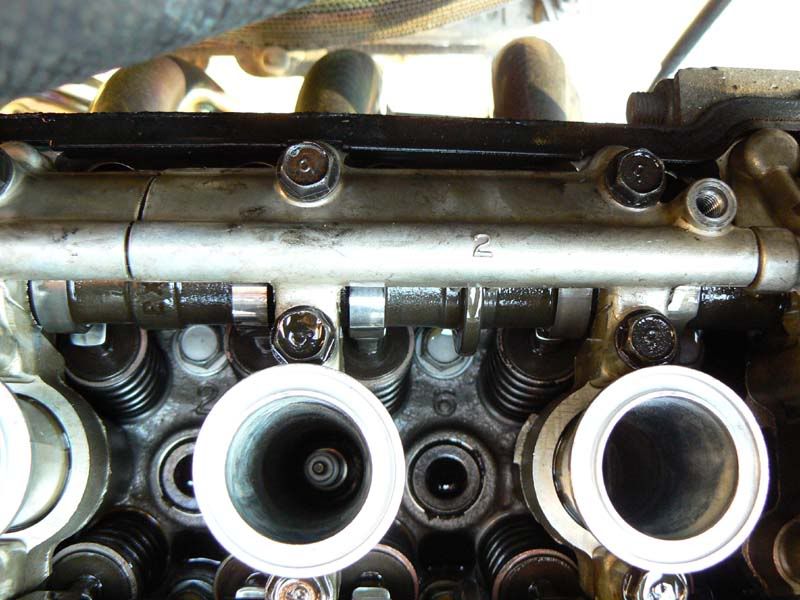
Measure between rocker and cam lobe. Don't place the feeler directly onto the shim - you may get a false reading !
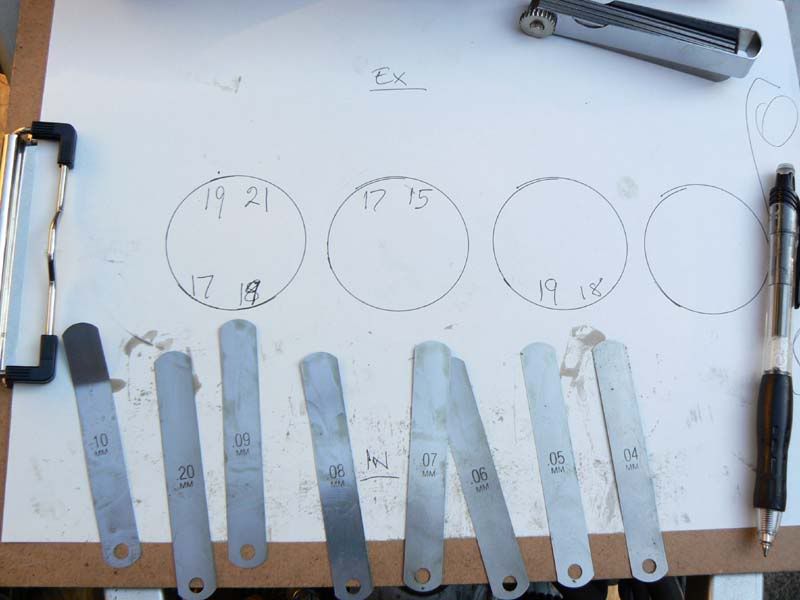
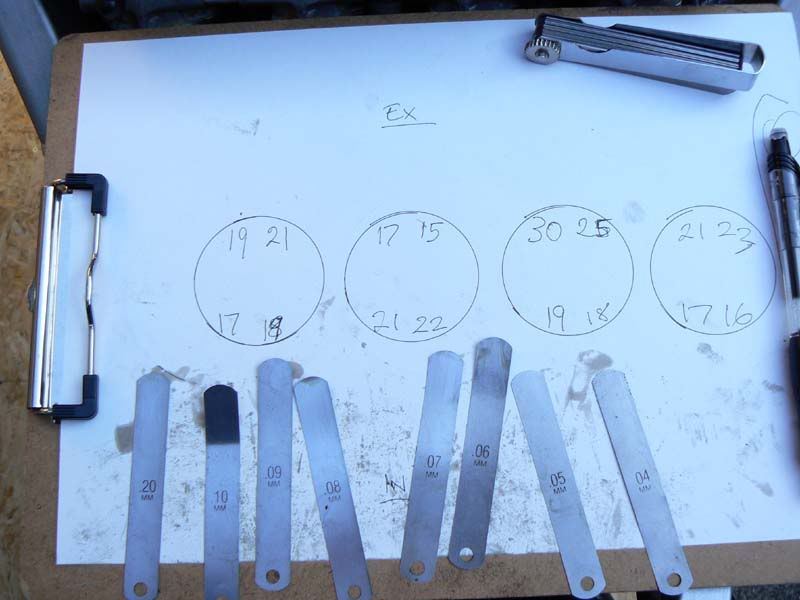
As you check each valve write down it's gap, I start with a feeler guage about the middle of the tolerance ie. .15mm for inlet and .19mm for the exhaust from there you work up or down to find it's exact measurement. NB: A shop will only use the upper and lower tolerance sizes to check that it is in within tolerance. Once you;ve got all the sizes down, you maybe lucky and none need done.
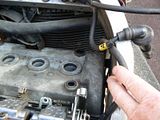
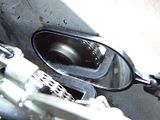
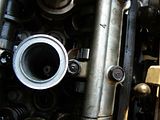
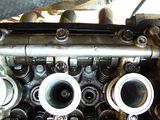
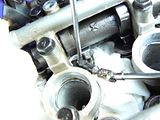
If you have valves at the lowest tolerance - change the shims. Tight valves will damage your engine and they don't have much to go! To make measuring the gaps easier you can remove the spark plug tunnels that plug into the cylinder head, they are held in place by "O" rings so be aware that ideally these should be replaced ("O"ring) with new ones, personally i recommend every time :
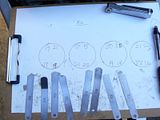
Regardless of whether you need to adjust shims or not, use this opportunity to make a shim chart for yourself. This will make your next valve clearance / shim swap an absolute doddle ! Each shim needs to be removed and it's number noted down, hence the need for a micrometer.
Mark the sizes along side your clearances on the sheet, you'll then use this to work out what new shims you need and what shims can be re-used.

REMOVING SHIMS:
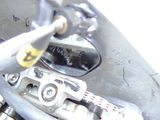
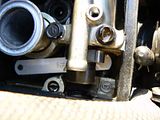
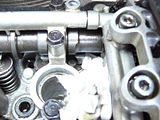
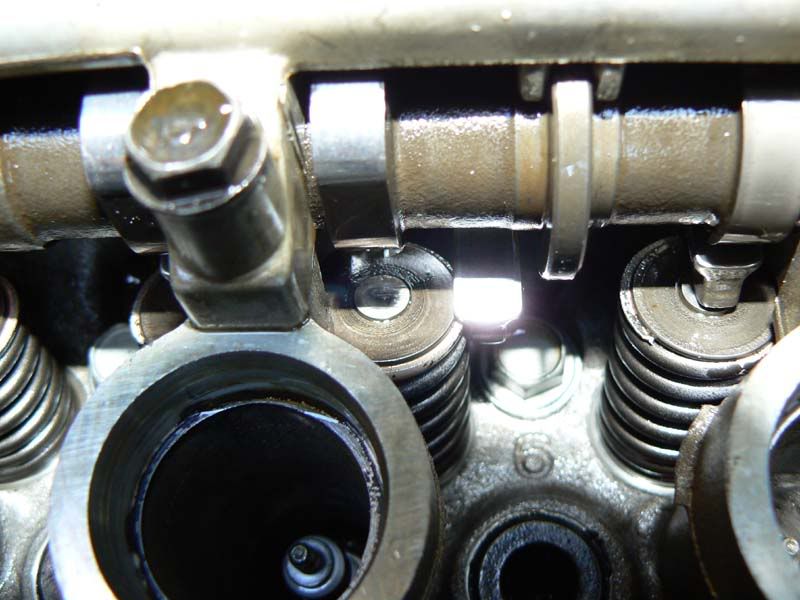
The rocker arms are spring loaded so the camshafts do not need to be removed , some can be accessed from the back of the camshaft shrouds but most you need to slide a fine screwdriver at the front of them and move them away from the cam cap. Once you have cleared the valve spring you can then press them down and let the spring hold them out of the way exposing the shim:
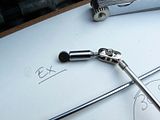
These shims are tricky to get out as they are held in place by oil suction so this is where the magnetic pick up tool comes into play. I found one with a short head that could also be angled and is perfect for the job. The magnet removes the shim with no problem and also prevents it from falling into the cylinder head:
After measuring replace the shim, it may require being removed later on once you know all the measurements (a shop wouldn't do this as they generally have a stash of shims and just change it there and then). Before fitting the shim back in place pack around the area with clean rags - if you've removed the spark plug tunnels/wells pack inside there too, using your finger add a small drip of clean engine oil into the shim seat if it's dry:
I have flat fine pliers for refitting (as not to damage the surface of the shim) and once I have them sitting in place push them down into the seat with my finger. Then you release the rocker and guide it back across to it's home sitting on top of the shim - avoid allowing to snap back across under the tension of the spring. While fitting the shims back in using the pliers a couple got poorly placed hence the need for packing around the area so i developed a new method which made them so much easier to get back in and sped up the job too
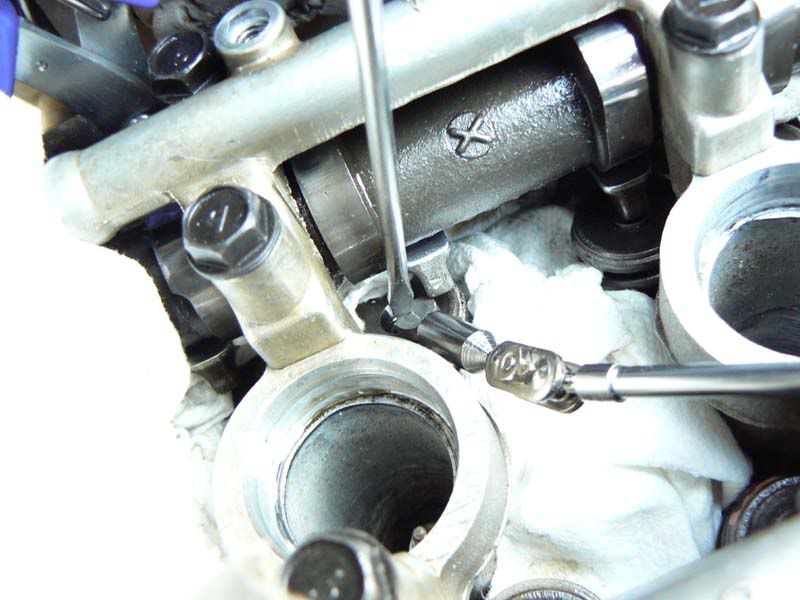
What I done is used the magnetic tool to place the shim back on top of the valve and used the screwdriver to hold it in place while removing the magnetic tip. I then used the screwdriver to place the shim back into it's well and i also gave them a press with my finger to make sure they were fully seated:

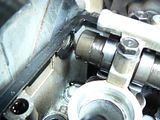
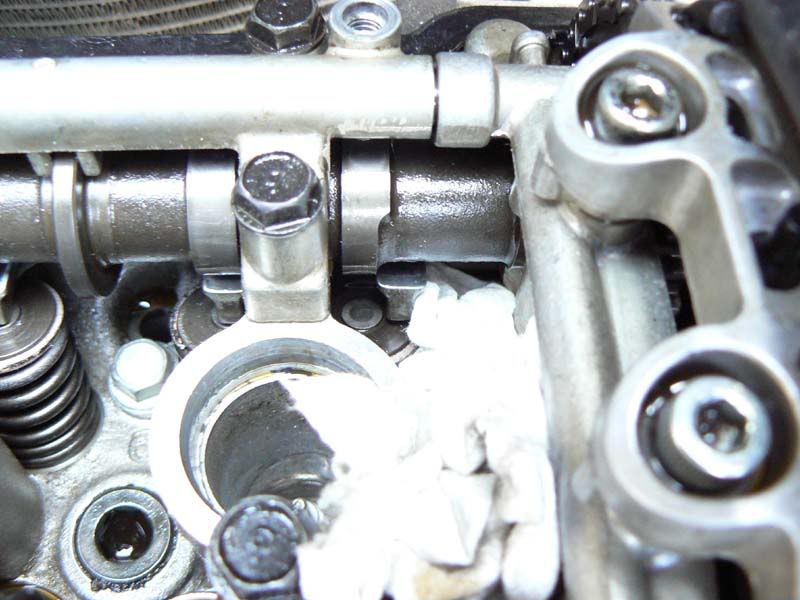
As pointed out on the discussion thread the outer rocker arms on each camshaft have a shorter travel to move out of the way and can not be rested on the valve spring. What you can do is slide it across and lift it up so that it is resting on the cam lobe:
You can also use the pliers sitting in at the back of the cam to keep it pushed over and i used this method on a couple, once the packing is in it jamb's it too.
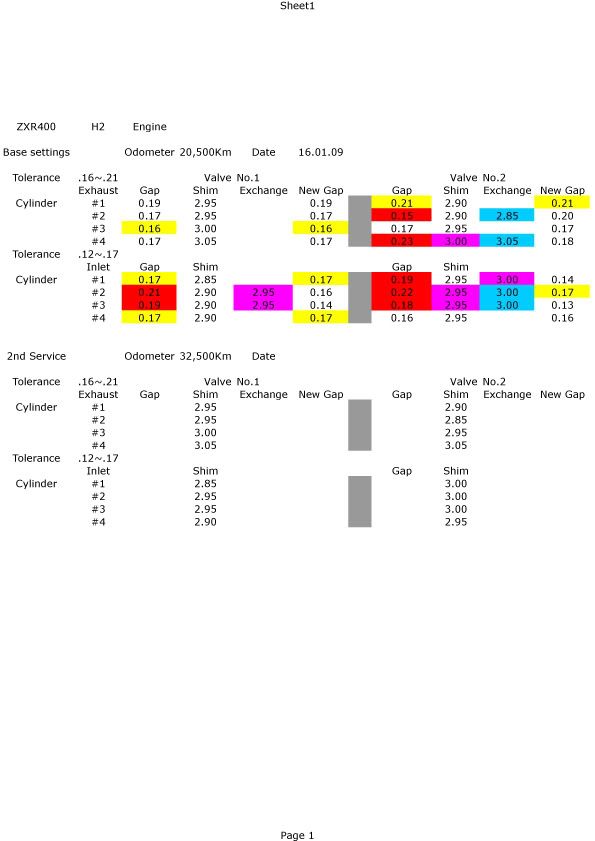
Exhaust tolerance runs from 0.16~0.21mm
Inlet tolerance runs from 0.12~0.17mm
GOLDEN RULE:
Big gap needs Bigger shim
Small gap needs Smaller shim
Anything your unsure about or I haven't explained well let me know and I'll try to get the info up. Of course you should be using this guide along with the workshop manual about this procedure.
I've used the engine still in the frame to see what you'll be up against and I'm glad i did as it certainly needs a few done
Your going to have to get access to the pulsar cover for removal and of course remove the fuel tank,airbox and disconnecting the carb's from the inlet rubbers makes the Cam cover off a bit easier too. ( My initial reaction was remove the engine too !
Recommended / Necessary tools:
Magnet pick up tool - as pictured.
Angled feeler gauges - you'll see my new flat set is already bent !
Micrometer.
Inspection mirror.
Flat leg pliers.
Small long handled screwdriver.
8 & 10mm small sockets
19mm medium socket
Box for shims.
Arm yourself with a sheet of paper and a pen too :


Pulsar Cover:Remove pulsar cover by undoing 6 x 8mm hex heads.

Pulsar/rotor set on "T" mark for measuring valve clearance: You'll need a 19mm socket on a ratchet for spinning the engine to set up the timing marks.

Cam cover has side vibration dampers that need removed:You'll also need a 10mm socket for removing the rocker cover.

Cam cover:

Coolant hoses get in the way but don't need removed: I also dangled the HT leads over the side of the frame beams (not so much dangled as they are stiff as a board with age)
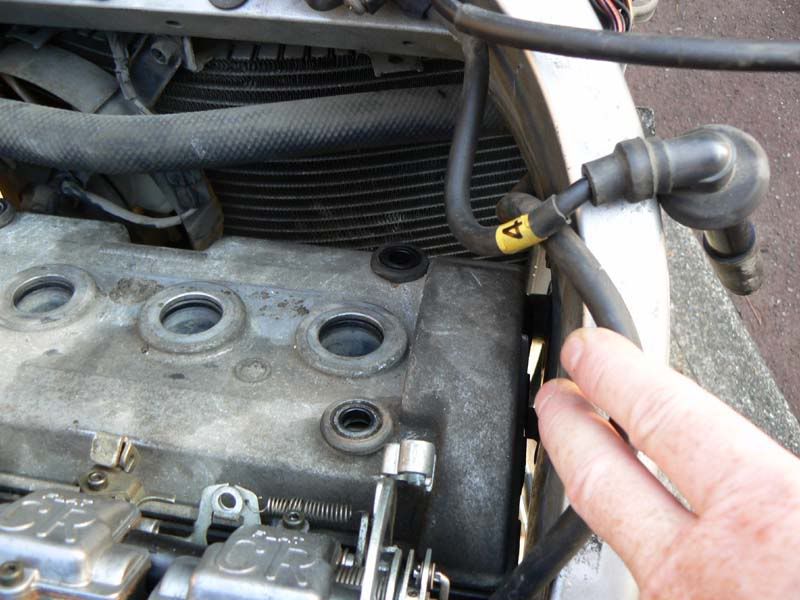
Lifting cam cover and holding hoses out of the way:

It's a bit of a wrestle but the cover eventually comes away:

Make sure you have the four oil seals that sit on top of the spark plug tunnels:
With the pulsar set up on it's "T" marks you need to identify what valves can be checked.
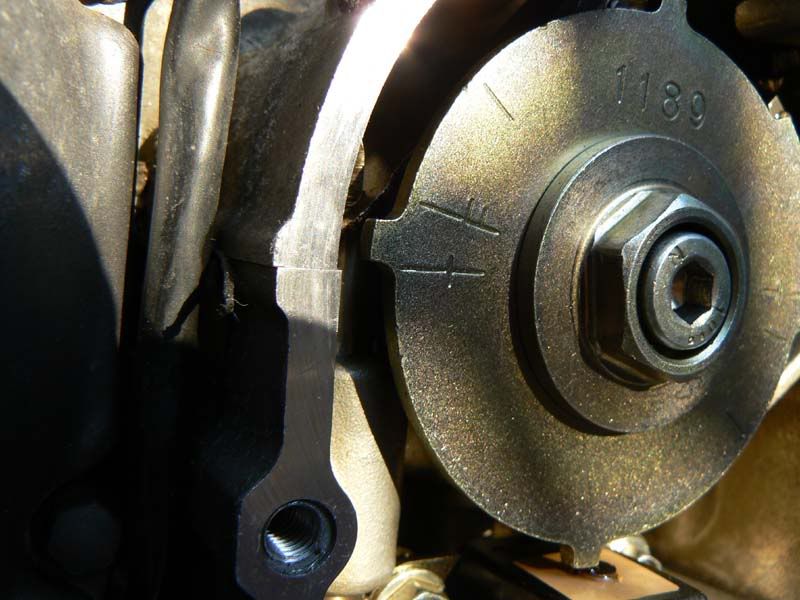
The camshaft sprockets have alignment marks on them for reference but the frame beam pretty much obliques it so this is where the inspection mirror comes in handy . In this position :
The following valves can be checked adjusted, #2 Inlet , #3 Exhaust , #4 Inlet & #4 Exhaust
The cam lobes for #4 cylinder will look like this:
If you look to left hand side of the cam's you'll also notice they have deep notches in them at this setting they will be pointing away from each other:

Once you have finished doing these valves you then spin the timing mark 360' so that the sprocket marks oppose each other and the notches on the other end will look like this:


The T mark will still be like this:
The following valves can be checked adjusted, #1 Exhaust , #1 Inlet , #2 Exhaust & #3 Inlet
Another reference is the actual camshaft lobes themselves. On each timing setting the lobes for cylinders 2&3 always point straight up:
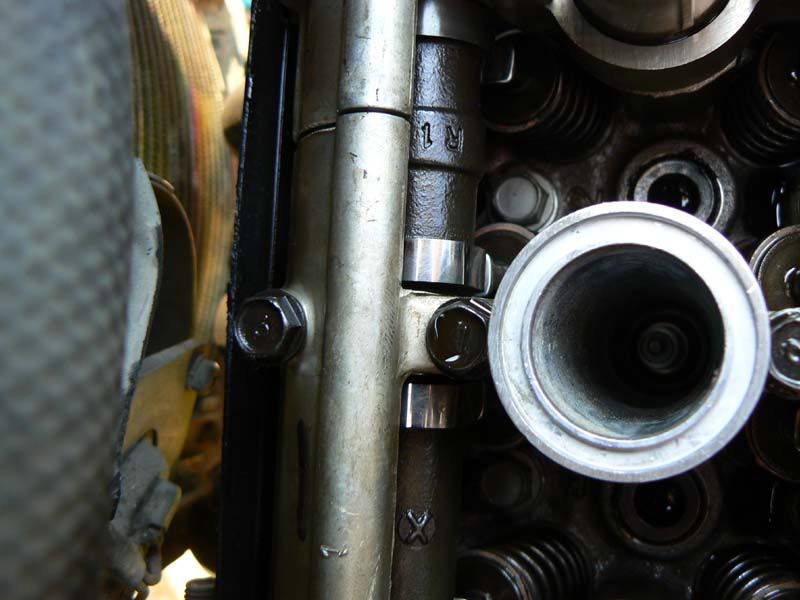

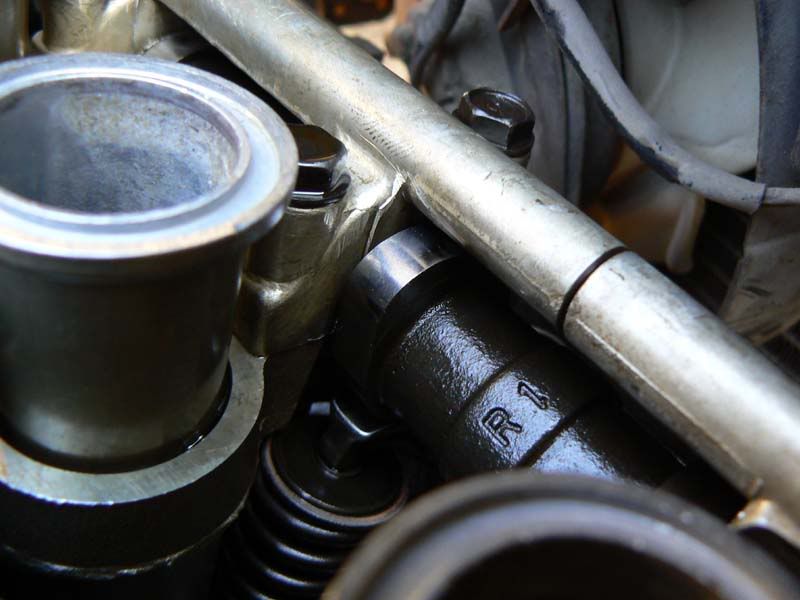
On one cycle the exhaust of cylinder 3 is pointing up and the Inlet of cylinder 2 is also the same (their counterpart is fully compressing the valve open). On the next set-up cycle then Inlet on cyclinder 3 is pointing up and Exhaust on cylinder 2 is also the same.
The cam lobes for #1 cylinder will look like this:

Measure between rocker and cam lobe. Don't place the feeler directly onto the shim - you may get a false reading !

As you check each valve write down it's gap, I start with a feeler guage about the middle of the tolerance ie. .15mm for inlet and .19mm for the exhaust from there you work up or down to find it's exact measurement. NB: A shop will only use the upper and lower tolerance sizes to check that it is in within tolerance. Once you;ve got all the sizes down, you maybe lucky and none need done.
If you have valves at the lowest tolerance - change the shims. Tight valves will damage your engine and they don't have much to go! To make measuring the gaps easier you can remove the spark plug tunnels that plug into the cylinder head, they are held in place by "O" rings so be aware that ideally these should be replaced ("O"ring) with new ones, personally i recommend every time :

Regardless of whether you need to adjust shims or not, use this opportunity to make a shim chart for yourself. This will make your next valve clearance / shim swap an absolute doddle ! Each shim needs to be removed and it's number noted down, hence the need for a micrometer.
Mark the sizes along side your clearances on the sheet, you'll then use this to work out what new shims you need and what shims can be re-used.
REMOVING SHIMS:
The rocker arms are spring loaded so the camshafts do not need to be removed
These shims are tricky to get out as they are held in place by oil suction so this is where the magnetic pick up tool comes into play. I found one with a short head that could also be angled and is perfect for the job. The magnet removes the shim with no problem and also prevents it from falling into the cylinder head:


After measuring replace the shim, it may require being removed later on once you know all the measurements (a shop wouldn't do this as they generally have a stash of shims and just change it there and then). Before fitting the shim back in place pack around the area with clean rags - if you've removed the spark plug tunnels/wells pack inside there too, using your finger add a small drip of clean engine oil into the shim seat if it's dry:

I have flat fine pliers for refitting (as not to damage the surface of the shim) and once I have them sitting in place push them down into the seat with my finger. Then you release the rocker and guide it back across to it's home sitting on top of the shim - avoid allowing to snap back across under the tension of the spring. While fitting the shims back in using the pliers a couple got poorly placed hence the need for packing around the area so i developed a new method which made them so much easier to get back in and sped up the job too

What I done is used the magnetic tool to place the shim back on top of the valve and used the screwdriver to hold it in place while removing the magnetic tip. I then used the screwdriver to place the shim back into it's well and i also gave them a press with my finger to make sure they were fully seated:

As pointed out on the discussion thread the outer rocker arms on each camshaft have a shorter travel to move out of the way and can not be rested on the valve spring. What you can do is slide it across and lift it up so that it is resting on the cam lobe:

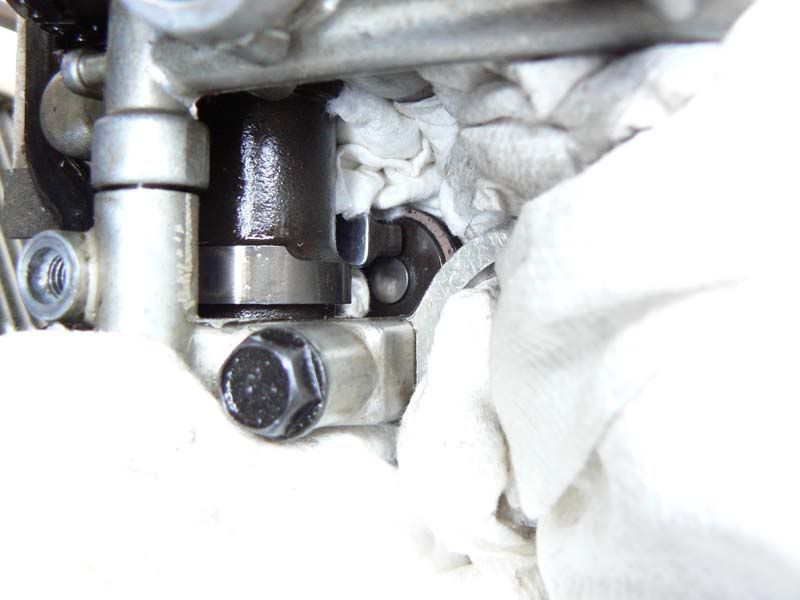
You can also use the pliers sitting in at the back of the cam to keep it pushed over and i used this method on a couple, once the packing is in it jamb's it too.
Exhaust tolerance runs from 0.16~0.21mm
Inlet tolerance runs from 0.12~0.17mm
GOLDEN RULE:
Big gap needs Bigger shim
Small gap needs Smaller shim
Anything your unsure about or I haven't explained well let me know and I'll try to get the info up. Of course you should be using this guide along with the workshop manual about this procedure.