Correct Cam Timing + Chain Fitting
Posted: Tue Jul 03, 2012 5:42 pm
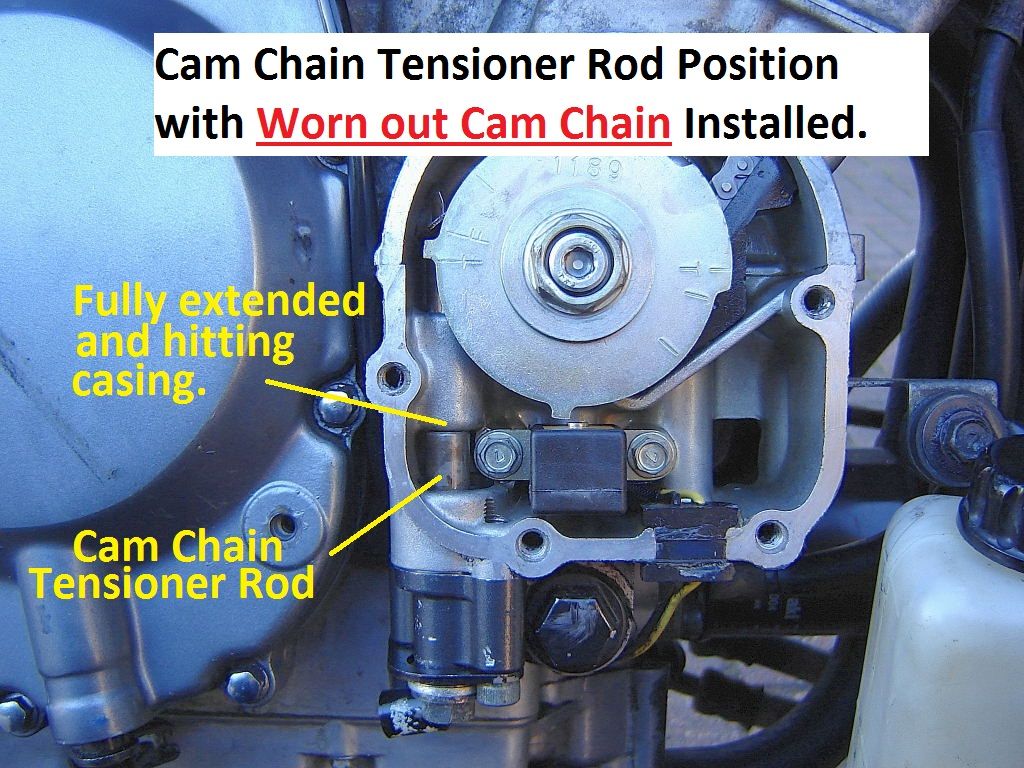
I just fitted a new cam chain, so I thought I would post a few pics to help people do the same task.
The part of the work I am focusing on is fitting the new chain onto the cam chain bottom sprocket.
Looking at earlier posts it seems a lot of people struggle with this and resort to grinding part of the casing to help fit the chain on the sprocket.
Maybe there is no choice on other bikes, from different years and different production runs, but my chain went on easy. It may just be a case of correct positioning and technique.
The bike is an L model, not H. Chain is a new genuine Kawasaki chain.
I left the crankshaft in the same place as when I removed the old chain.
It took me a while to remove the old chain and I thought the same sprocket positioning may help me get the new chain on easier.
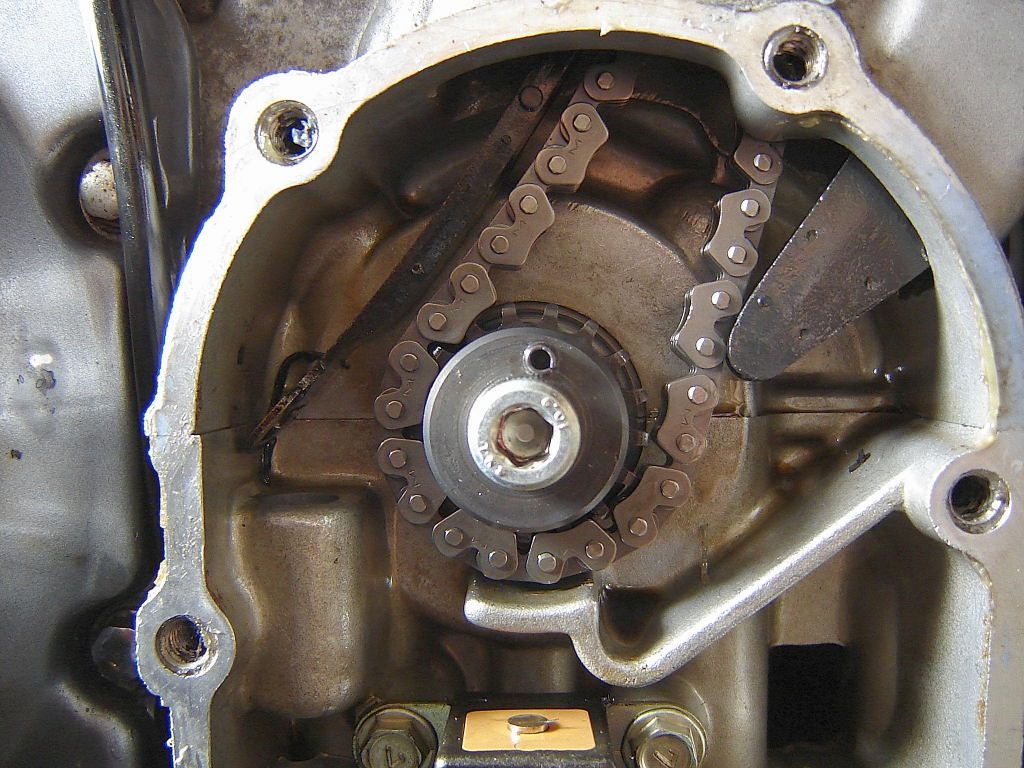
It may help you to get the lower sprocket teeth into this position - at the bottom where it is nearest the casing. It may be a nice starting position for slipping the chain on.
Note the front cam chain guide has been pushed up, out of the way. The M8 cap head has been re-inserted in the end of the crank to allow the crank to be moved.
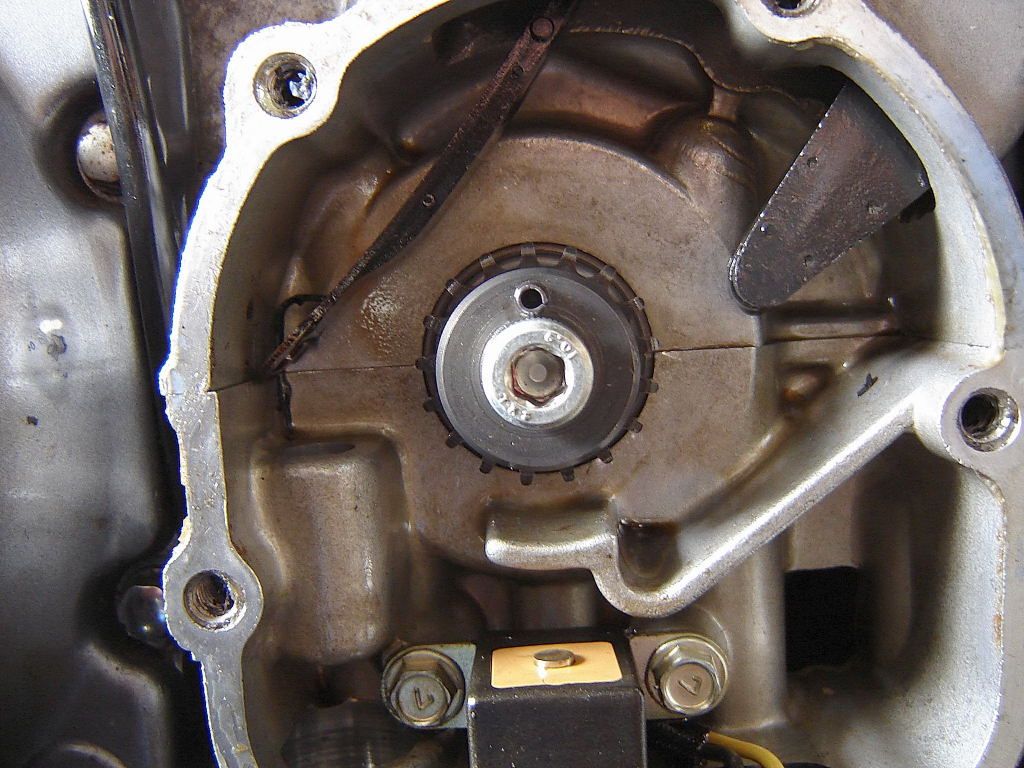
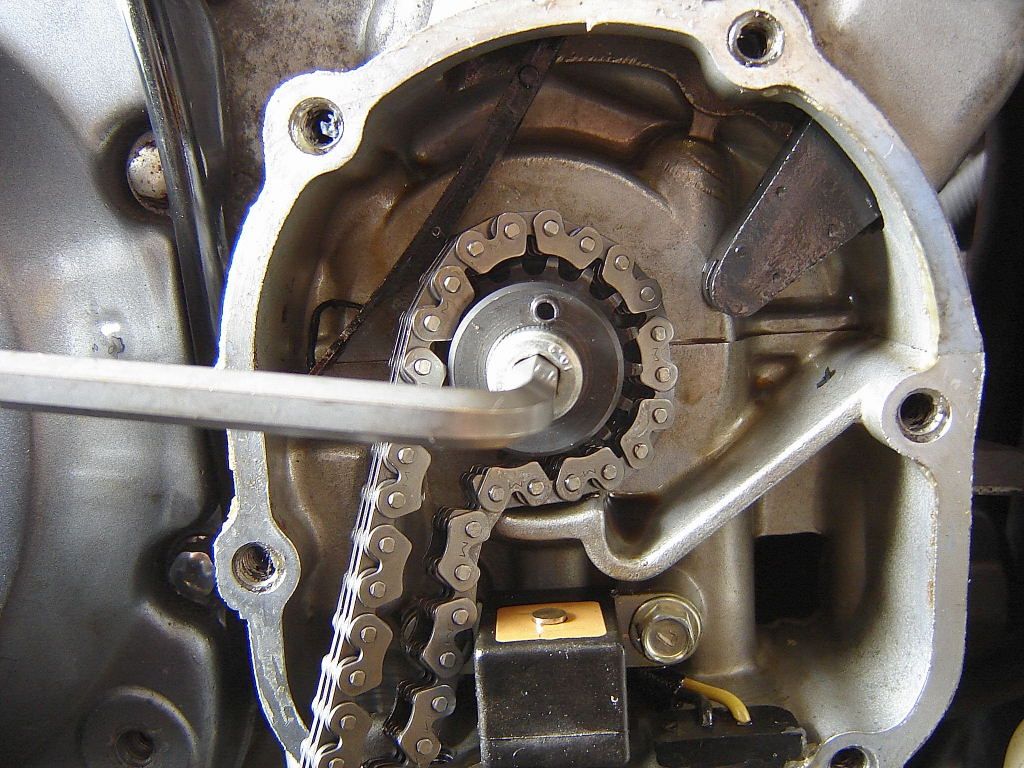
This is the way I placed the new chain over the back of the sprocket and trailing in front of the lower part of the sprocket where it is a tight fit between sprocket and case.
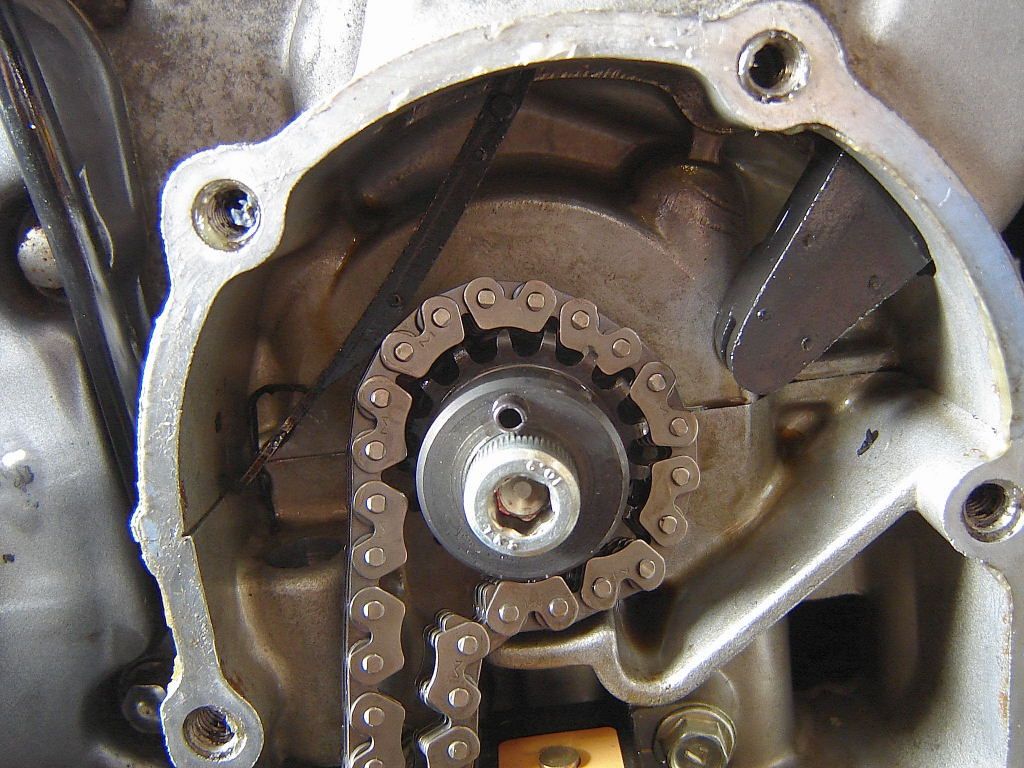
I then used an allen key to turn the crank clockwise a small amount and the chain just slid back into position on the sprocket. The chain is actually fully on the sprocket at the bottom in this picture.
I could not achieve this just by pushing the chain on the sprocket, I had to move the crankshaft slightly.
You can see how far the crank has moved by looking at the position of the pin in the end of the crank.
The chain was never jammed between the sprocket and case. It just fell back into position. Be careful not to jam your chain between sprocket and case.
I had to use very little force to turn the crank. No more force than normal crankshaft rotation.
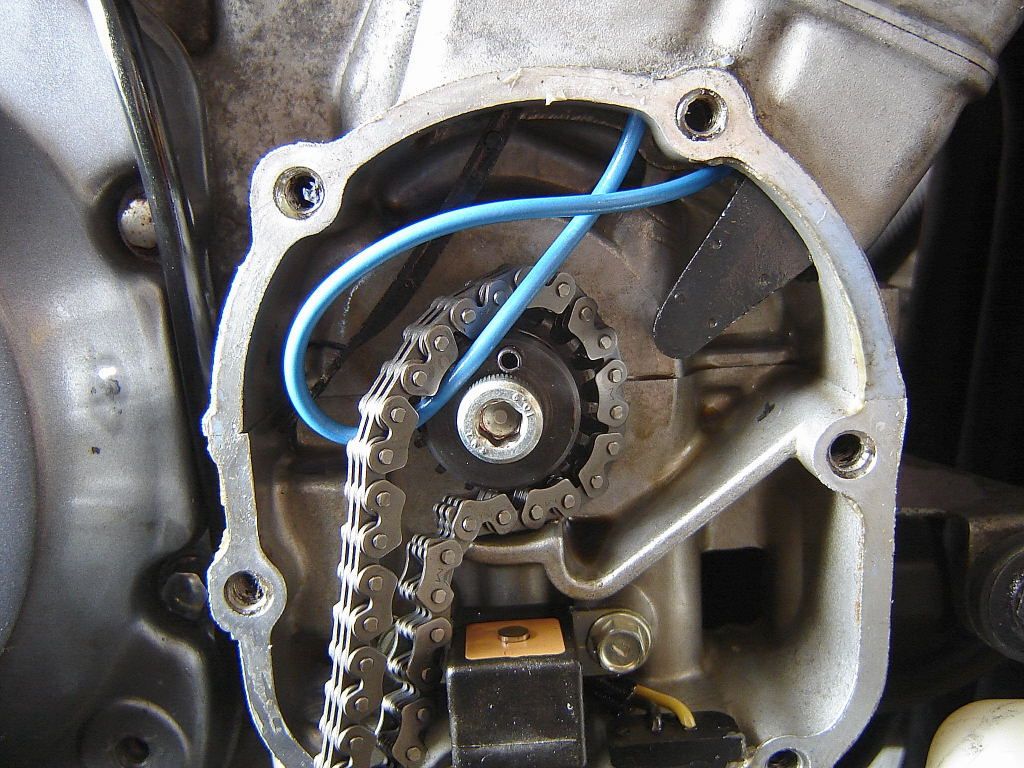
With the hard part over I then just lowered a thick piece of wire down the cam chain tunnel, passed it around the chain, and back up out the top.
I then used this to pull the chain out the top of the engine, being careful not to let the chain slip off the sprocket at the bottom.
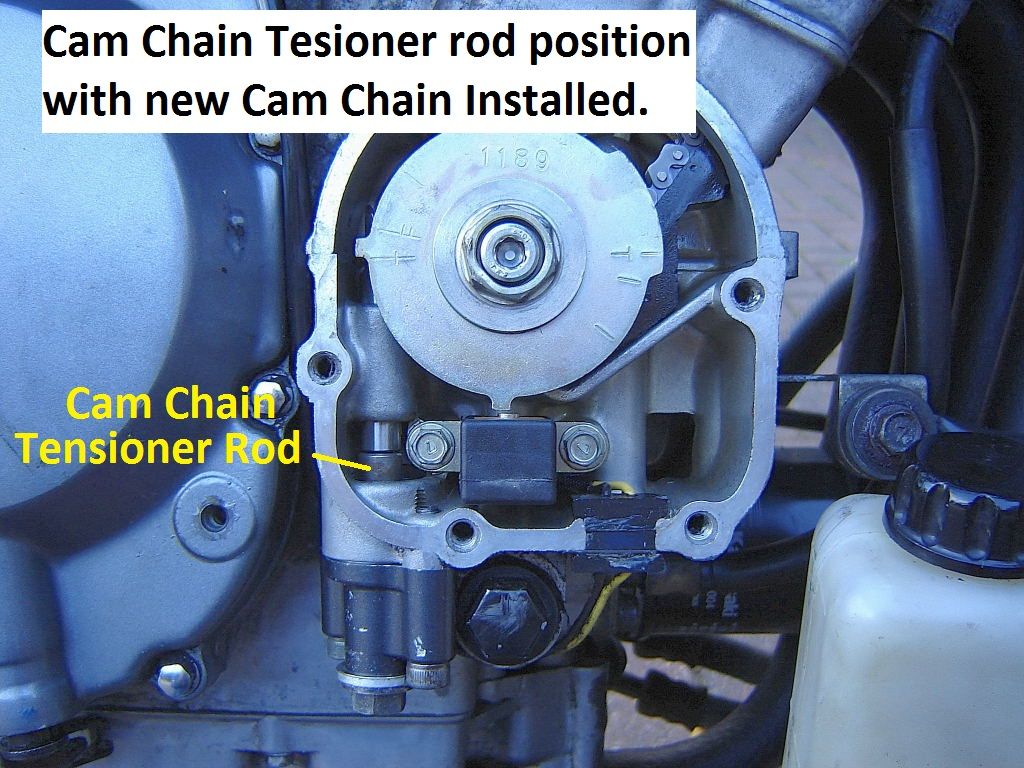
New chain fully installed.
It did take me a while to remove the old chain, and there were a few times where I thought It was impossible.
I tried all kinds of different positions with the free end of the chain.
In the end what worked for me was to have the chain outside of the engine and straight up from the crank leaving just that trapped bit underneath the sprocket.
I then turned the crank slightly with the allen key and the chain came out from under the sprocket, with the sprocket left in the position as shown in the first photo.
Again, the chain did not get jammed between sprocket and case. It just needs this slight movement of the crank to help it out.
Hope this helps someone.
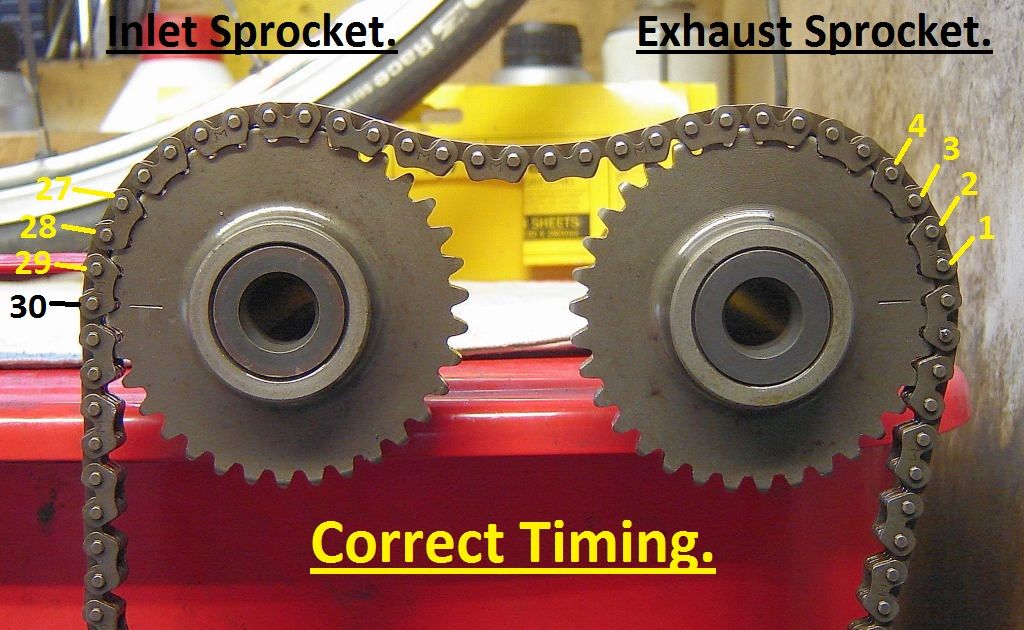
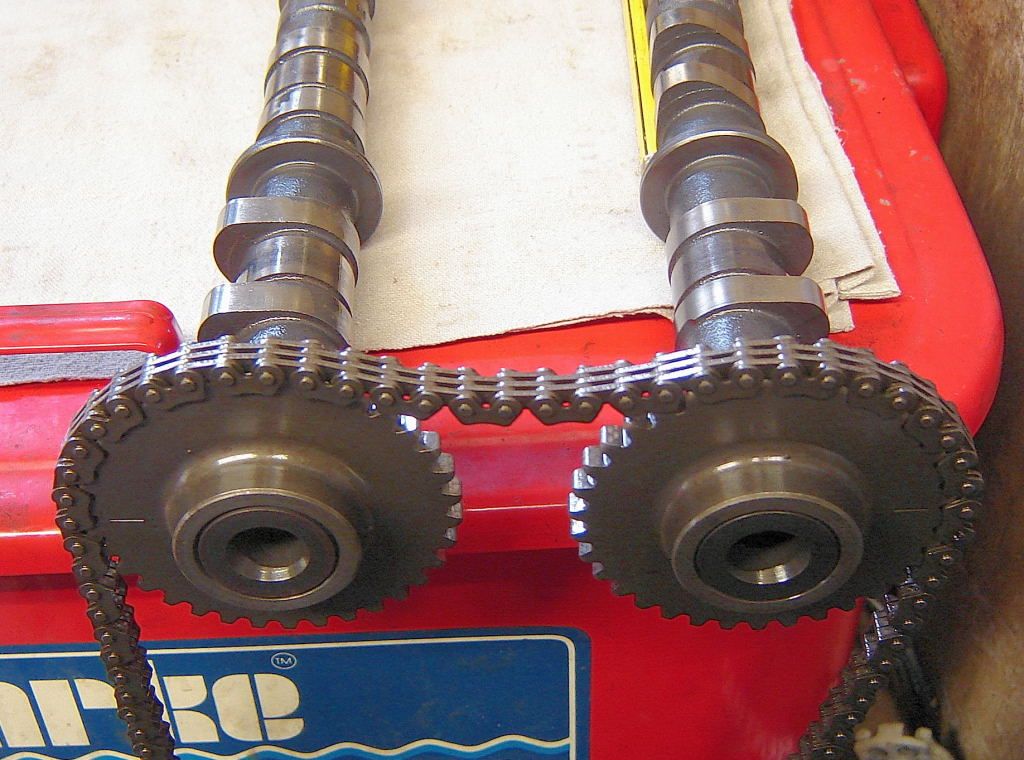
I just wanted to confirm the correct cam timing. A bike I am working on appeared to be out by one tooth on the intake sprocket.
I have removed the sprockets and cam chain and arranged them as what I think should be the correct timing, as per the manual.
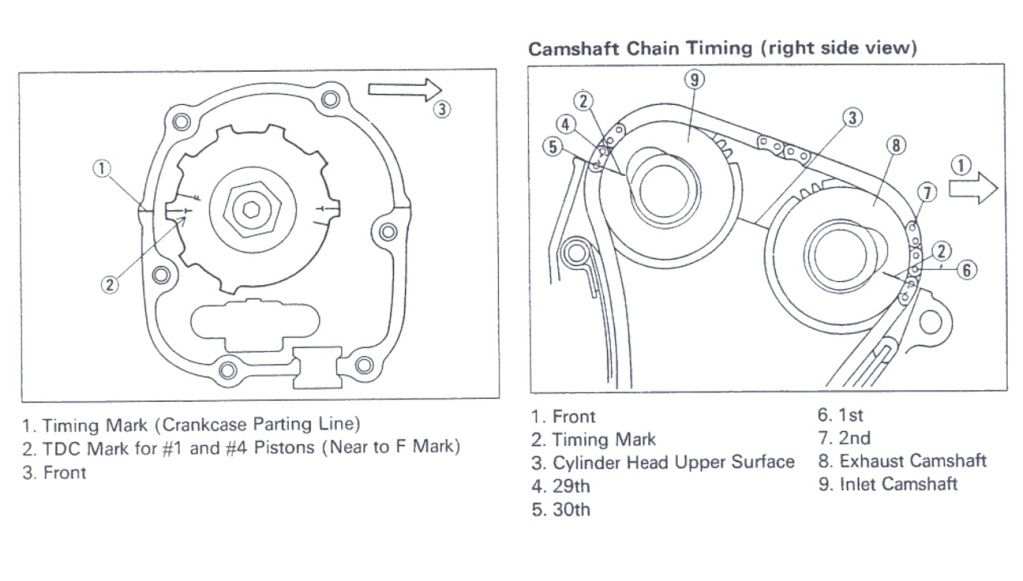
Obviously the crankshaft timing rotor 'T' mark (near the 'F' mark) has to be in line with the crankcase joint, and the marks on the camshaft sprockets have to be in line with the head surface.
The part of the work I am focusing on is fitting the new chain onto the cam chain bottom sprocket.
Looking at earlier posts it seems a lot of people struggle with this and resort to grinding part of the casing to help fit the chain on the sprocket.
Maybe there is no choice on other bikes, from different years and different production runs, but my chain went on easy. It may just be a case of correct positioning and technique.
The bike is an L model, not H. Chain is a new genuine Kawasaki chain.
I left the crankshaft in the same place as when I removed the old chain.
It took me a while to remove the old chain and I thought the same sprocket positioning may help me get the new chain on easier.
It may help you to get the lower sprocket teeth into this position - at the bottom where it is nearest the casing. It may be a nice starting position for slipping the chain on.
Note the front cam chain guide has been pushed up, out of the way. The M8 cap head has been re-inserted in the end of the crank to allow the crank to be moved.
This is the way I placed the new chain over the back of the sprocket and trailing in front of the lower part of the sprocket where it is a tight fit between sprocket and case.
I then used an allen key to turn the crank clockwise a small amount and the chain just slid back into position on the sprocket. The chain is actually fully on the sprocket at the bottom in this picture.
I could not achieve this just by pushing the chain on the sprocket, I had to move the crankshaft slightly.
You can see how far the crank has moved by looking at the position of the pin in the end of the crank.
The chain was never jammed between the sprocket and case. It just fell back into position. Be careful not to jam your chain between sprocket and case.
I had to use very little force to turn the crank. No more force than normal crankshaft rotation.
With the hard part over I then just lowered a thick piece of wire down the cam chain tunnel, passed it around the chain, and back up out the top.
I then used this to pull the chain out the top of the engine, being careful not to let the chain slip off the sprocket at the bottom.
New chain fully installed.
It did take me a while to remove the old chain, and there were a few times where I thought It was impossible.
I tried all kinds of different positions with the free end of the chain.
In the end what worked for me was to have the chain outside of the engine and straight up from the crank leaving just that trapped bit underneath the sprocket.
I then turned the crank slightly with the allen key and the chain came out from under the sprocket, with the sprocket left in the position as shown in the first photo.
Again, the chain did not get jammed between sprocket and case. It just needs this slight movement of the crank to help it out.
Hope this helps someone.
I just wanted to confirm the correct cam timing. A bike I am working on appeared to be out by one tooth on the intake sprocket.
I have removed the sprockets and cam chain and arranged them as what I think should be the correct timing, as per the manual.
Obviously the crankshaft timing rotor 'T' mark (near the 'F' mark) has to be in line with the crankcase joint, and the marks on the camshaft sprockets have to be in line with the head surface.